


So In my last blog, I showed you how you could make your web application a Containerized application if you haven't read the blog Please Click here to read the blog because we will be using the same web application we used in my previous blog.
This Blog is a continuation of that blog In that blog, we containerized the web application with the help of docker by making a docker image. We will use that docker image to deploy the web application into a Kubernetes Cluster or K8s Cluster. Not much of a project but for any beginner, it is a very lovely project because you will get to learn how to write a YAML file for deploying anything in Kubernetes, How to push and pull the docker image from the docker hub and many other things. So Let's Go
Prerequisite
Basic Knowledge of Docker (if not click here to learn)
Docker need to be installed in your System
Web Application that you will use to deploy
Basic Knowledge of Kubernetes (if not click here to learn)
Basic knowledge of YAML
Step:- 1 (Push Docker Image)
So In the last Project, we created dockerfile with the help of the dockerfile we build the docker image and that image is available in our local system with the use of the docker run command, we run that image and all we did in that project.
So now what we need to do is we have to push that docker image which is in our local system to Docker Hub(Docker Hub is a hosted repository service provided by Docker for finding and sharing container images with your team. Docker Hub is a hosted repository service provided by Docker for finding and sharing container images with your team.).
Step: - A
So if you don't have the docker hub account click here and create your docker have an account and come back.
Now that you have created your docker hub account it is time we push the docker image that we created in your previous project to do so first we have to login into the docker hub with your terminal or Power shall because to push anything into your docker hub account we have to login other how the docker hub know that you have to push a docker image. it needs to authenticate the user.
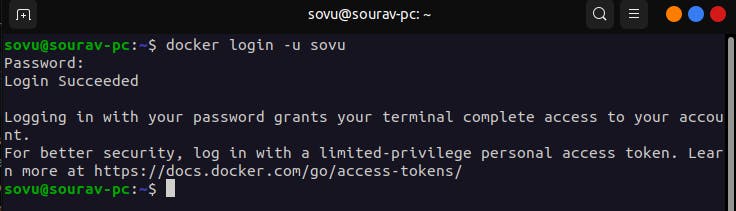
So this is the command that you need to log in sovu is my username you have to write your docker hub username that you must have to create just know it you have made it today.
docker login -u sovu
The moment you press Enter it will ask you for the password of your docker hub account you have to enter the password and if everything is fine it will show you that you have login succeeded. As you can see in the below image that's it should look like you log in.
Step: - B
So the next step is to push the docker image but before we do that we have to check whether your image must have a tag or not. So while building the dockerfile we have given the tag to the image if you forgot to do so don't we can do it now also.
There is a command that you need to enter to add the tag in your docker image.
docker tag portfolio-website:latest sovu/dockerhub:portfolio-website
portfolio-website it is my docker image name.
latest it is the tag that I have given to the docker image.
sovu/dockerhub:portfolio-website it is the location of the docker hub
Step:- C
Now we can push our docker image into the docker hub. To do so we have to put this command into your terminal.
docker push sovu/dockerhub:portfolio-website
The moment you enter this command it will push the image to your docker hub image. This's it you have done it. Great job know go to the docker hub website and you will be able to see your docker image.
Step:- 2 (Create YAML File)
Till now we have done a great job knowing it's the most important time to because time to create the YAML file that will let us deploy our docker image or your web application.
In YAML the identation is very importent or then python so be carefull with space you use will write of if you are now then you can also just copy my code.
First, we have to create a YAML file you can use any code editor you like and create a file with the name deployment.yml this will be the name of your YAML file.
apiVersion: apps/v1
kind: Deployment
metadata:
  name: web
spec:
  replicas: 2
  selector:
    matchLabels:
      app: web
  template:
    metadata:
      labels:
        app: web
    spec:
      containers:
      - name: portfolio-website
        image: docker.io/sovu/portfolio-website:latest
        ports:
        - containerPort: 8080
apiVersion it has Kubernetes API you're using to create this object.
kind it has the kind of your YAML file in our case we are deploying so it's Deployment.
metadata it helps uniquely identify the object.
spec YAML specification identifies an instance document as a "Presentation" or "character stream".
replicas it has the number of replicas that need to create in case of downtime.
selector An optional object that tells the Kubernetes deployment controller to only target pods that match the specified labels.
containers it has the details of the container like container name, docker image location, and container ports.
So I've tried to explain what these objects are and why we have used them. The YAML file is ready so let's just save it.
Step:- 3 (Start Minikube)
So to deploy your container into the Kubernetes cluster first we need a Kubernetes cluster so the best way to get a local Kubernetes cluster is by using Minikube. So if you haven't installed minikube into the local system then go to the minikube webpage to see how to download it very easy to do so.
But wait before you install the minikube first we need to install kubectl. Kubectl is The Kubernetes command-line tool, kubectl, allows you to run commands against Kubernetes clusters. You can use kubectl to deploy applications, inspect and manage cluster resources, and view logs. So click here to install kubectl and install minikube.
Now you have installed the minikube let's start the minikube which will start a Kubernetes cluster with One master node and two worker nodes.
minikube start
if everything is well and good then your Kubernetes Cluster will be up and running.
Step:- 4 (Apply the YAML File)
Now it's time to deploy the web application with the help of the YAML file that we have created to do so.
kubectl apply -f deployment.yml
kubectlAs you can see we have used the kubectl command to interact with the Kubernetes cluster.
apply Manages applications through files defining Kubernetes resources. It creates and updates resources in a cluster by running kubectl apply
-f it means we are applying the file.
We have deployed your web application so to check that your deployment has been completed successfully we use a command to check that
kubectl rollout status deployment/web
Step:- 5 (Access your App)
Now that we have deployed your web application it is time we can access the web application this will also make sure that everything went well we have done all the parts in the right way.
So to do that we can expose the port so that we can see that we have deployed the application and for that we have port-forward
kubectl port-forward deployment/web-app 8080:80
We are exposing our web application at host port 8080 and change any port as you can if this port is busy.
Now Let's go to localhost:8080 see your web application.
THE END
In case you come up with an error while creating this project which you will I know we all have so don't worry much just give a google search for that error I'm sure that you find the solution for that problem. Don't give up Take a break and try again to can do it.
That is all for today hope you enjoyed will doing this project with me. if you do so please do share and if you have any questions please let me know happy to help you.