


In this Blog, We will I create a project based on docker I will use my Portfolio webpage as a web application and then I create a dockerfile to build the docker images. After the create the dockerfile we will that dockerfile to build the image and deploy the image in the docker container after all this, we can visit our first web application. Before Starting this project I hope you have some basic knowledge what is docker, container, and some basic commands of it. If not then no problem you can just visit my Docker series where you will learn the basics of docker. Okay, now you have the basics of docker then let's make a simple but very important project which will help to understand how things work in docker.
Prerequisite
- Basic Knowledge of Docker
- Docker need to be installed in your System
- Web Application that you will use to deploy
Step 1
So I'm using my Portfolio webpage as a web application you have a web application that works fine then you can use that web application but you don't have one don't worry you just download it. After downloading it make sure it is working fine. Now put your web page content in one folder all the images, HTML, CSS and javascript files should be in one folder.
Step 2
Now we will create the dockerfile in this file we will write the step that needs to be done to run the web page in a container. The name of the file will be dockerfile . it should be just dockerfile no . or .txt there should be no extension in the file name. This file is created in the same folder where your all files are there.
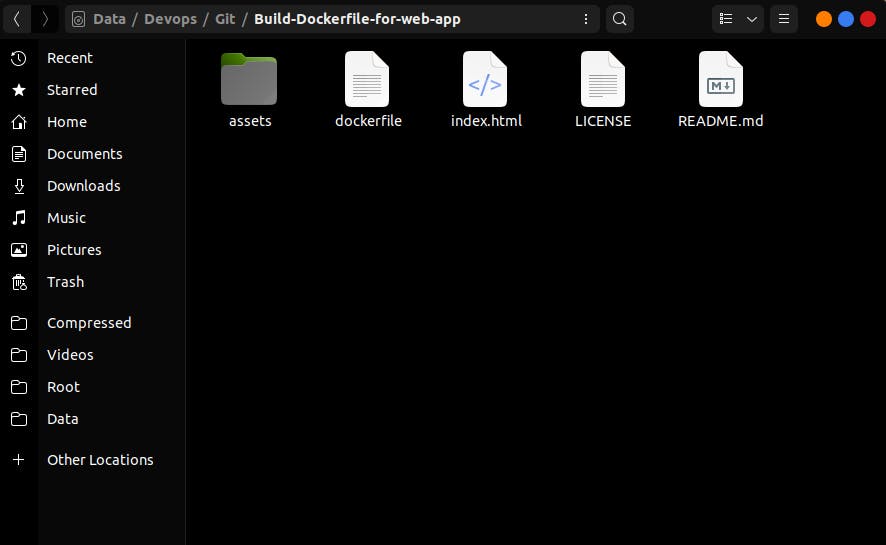 In the above image, you can see how I created the dockerfile your file should look the same as in this image.
Step 3
Now we will write code for the dockerfile which has all the dependencies that our web page needs to run in the container.
FROM nginx:alpine
COPY . /usr/share/nginx/html
This is the code you need to copy and paste into your dockerfile. I know it a very some code because we don't have much to do we just run a web page.
FROM:- This is pulling the image from the docker hub and install in the container.
nignx:- Nignx is a web server that we need to run the web pages.
alpine:- It is a Lite version of Nignx. you can also use any other versions of nignx.
COPY:- It is used to copy and paste. what we are copying and pasting is all the files. all the files that are in the folder are copying it to niginx folder so that niginx can run the web page.
Step 4
After Creating the dockerfile now it's time to build the docker image. To do so we have to open the Terminal. I'm using a Linux machine if you are on a windows machine you can open CMD or if you are on mac then open the Terminal. So Open your terminal inside our project file. So that we can execute the dockerfile
docker build -t test:v1 .
This is the command that will build the docker image.
-t:- With the help of -t we give it a tag name which is "test"
test:- This is the tag name.
v1:- This is the version of the image.
These things are important when you push your docker image in the docker hub.
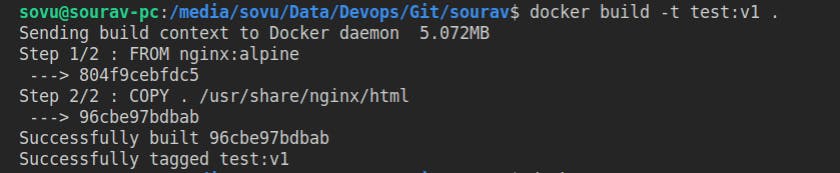 This is how it should look when you run the docker build command. As you can see we build the images successfully and it is showing as the docker image ID. In Docker, every docker image has its own unique ID.
So now that our image is built let's see it to see all the docker image that is in your system you can use the command or you can also use the docker desktop application to do so. I Use the command to see all my docker images.
docker images
This command will list all images that are in your system.

As you can see the first one with the name test is the image that we just create for their blog. That image has our web page and all the dependencies that our page needs. It also shows the image Tag, Image ID, created time and image size.
Step 5
Now that our image is built so it is time to run that docker image. But first, let me show you the syntax of the docker run command.
docker run -d -p 80:80 <image ID / image name>:tag
docker run:- This command will help to run the docker image.
-d:- it means to run the docker image in detached mode. it will run in the background and will not take the whole terminal.
-p:- it means we have to give the post to the host and container. The first 80 is for the host and the next 80 is for the docker container.
Image ID / Image name:- In here we will put the image ID or image name
tag:- In here we will put the image tag
docker run -d -p 80:80 test:v1
This is how we write the command to run the image. Now that we have run the docker image and our image is running we can visit our web page.
Step 6
Before going to the browser check whether the docker image running or not we can use some command to check that the docker image is running or not.
docker ps
This command will show you all the docker images that I running into the docker. It will list all the docker image that is running on your system.
Now Everything is done we have created the dockerfile then with the help of the dockerfile we build the docker image after the image is built we run the docker image which means our web page is running. To visit the web page we need to open the browser and in the address bar write
localhost:80
As you can see we are using the post 80 that we have given to the docker while running the image.
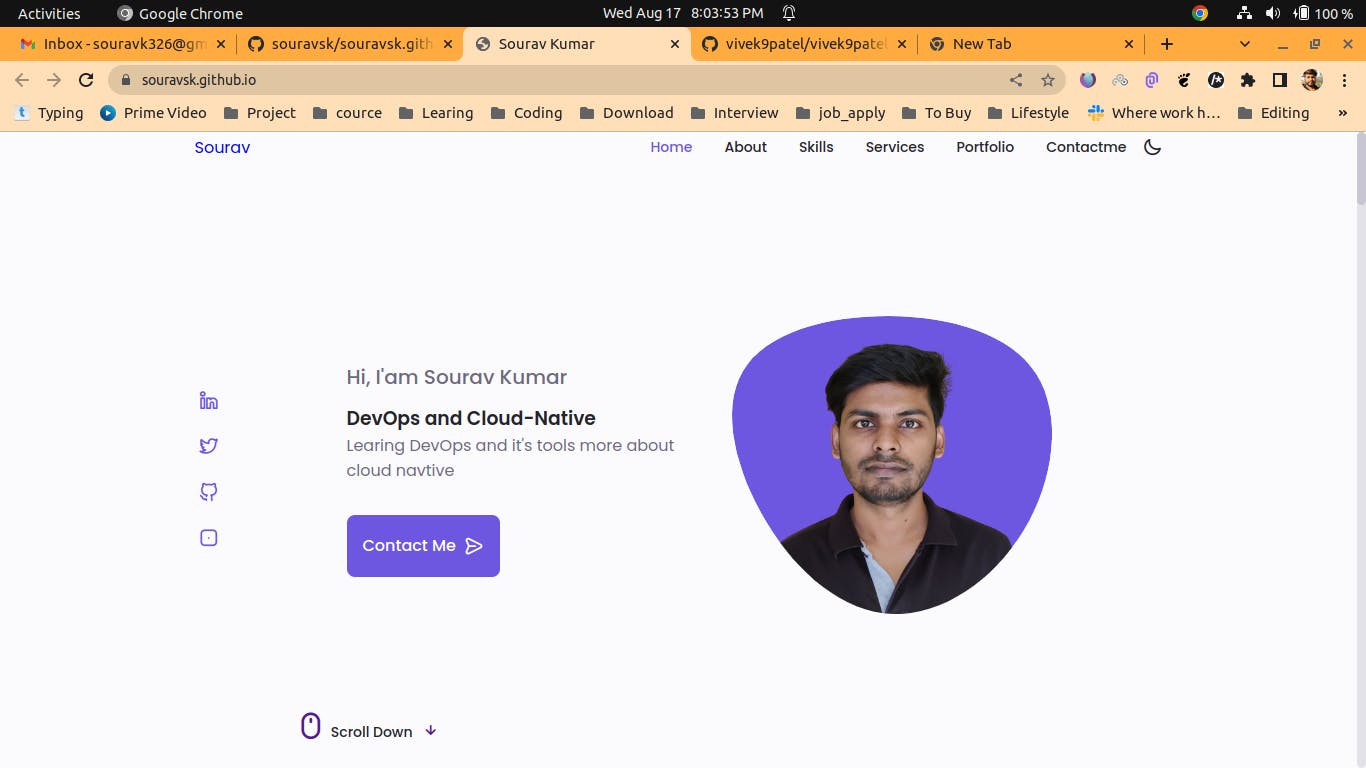 Looks like everything went well as you can see my web page is working fine. If you have also followed my whole step carefully your web page is also working fine.
Let's stop the docker image that is running to do will the docker image ID.
docker stop <image ID>
This command will stop the docker image. There is also a command that lets you see the docker images that are stopped so that you can verify that it is stopped.
docker ps -a
This command is used to show all the running and exited containers
THE END
Thank You for reading the blog I hope this will help you to create your first simple docker project and that you have learned many things by doing this project.