


Hey, Everyone this blog is beneficial for everyone but it is very useful for Students like me who are using a decade-old laptop which has a very poor configuration like 4GB Ram with Intel i3 Gen3 2 core. A system like this can and will create so many problems while your Learning journey and it will put you in a situation where you will start blaming your system and at a point, you will stop learning which is not good.
And I Know many of you will never face this problem but some of us face these problems mostly Students like me who don't have enough financial source to purchase a new machine.
And I also know many students say that it's enough system resources for their work or project but Students like me who want to pursue careers in DevOps, SRE, Platform Engineer, etc. So to make projects, test applications and create pipelines we use VM which takes so many resources. And Minikube is one of the software which uses VM to spin a Kubernetes Cluster in your local machine so that you can practice or test your applications.
So for those Students or anyone whose Machines don't have enough resources or who doesn't want to waste their time downloading minikube and Kubernetes now, they can use GitHub Codespaces to spin up minikube clusters for their projects or practices. So Let's See How First What is GitHub Codespaces?
What is GitHub Codespaces?
A codespace is a development environment that's hosted in the cloud. You can customize your project for GitHub Codespaces by committing configuration files to your repository (often known as Configuration-as-Code), which creates a repeatable codespace configuration for all users of your project.
Each codespace runs on a virtual machine hosted by GitHub. You can choose the type of machine you want to use, depending on the resources you need. Various types of machines are available, starting with a 2-core processor, 4 GB of RAM, and 32 GB of storage.
You can connect to your codespaces from your browser, from Visual Studio Code, from the JetBrains Gateway application, or by using GitHub CLI.
So it means that you can create your project just by using a browser you don't have to have a good machine with you to do so.
I hope you already know what is Minikube if In case you don't then don't worry I have already publicised blog on a Minikube to read that Click Here and If want to deep dive into Kubernetes Then Click Here to go to the Kubernetes Series.
Step 1:- Find the Codespaces
So Let's Start I hope you already have a GitHub Account if Not then Go to github.com and create a GitHub account and those who have an account already can just log in.
So when you log in you will be on your home page as you can see in this image below.
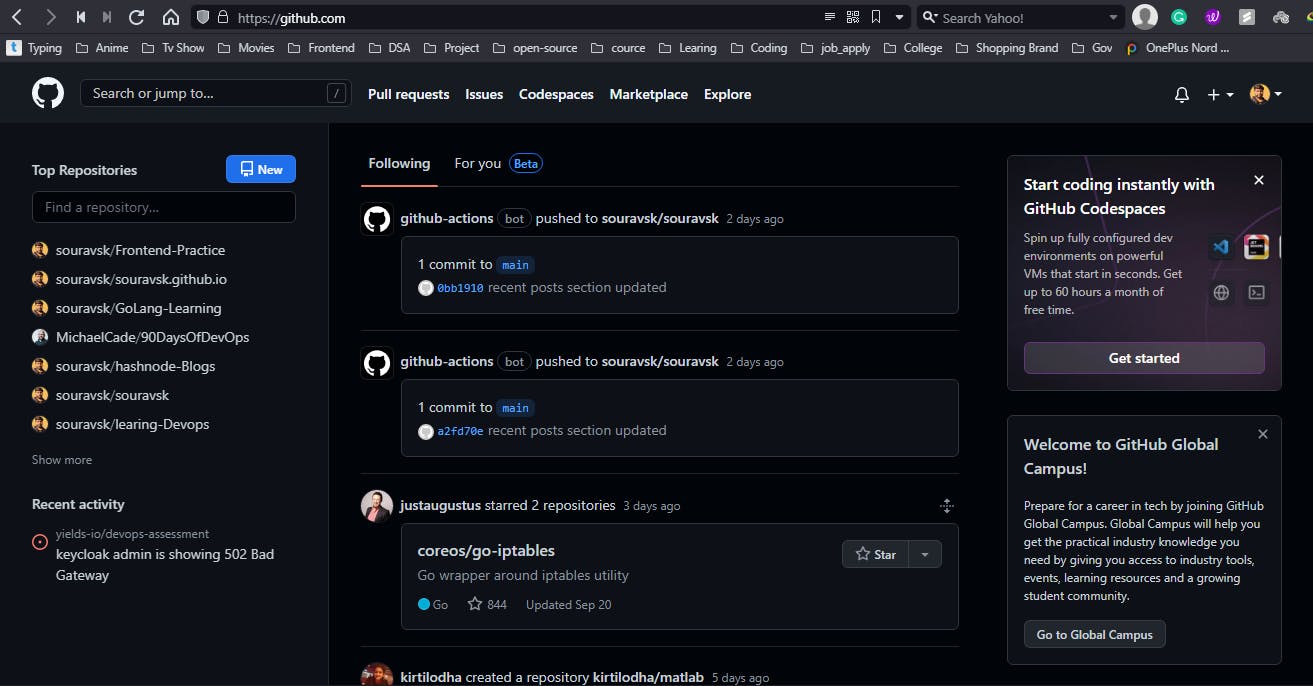
So this is what my GitHub Home page looks like. You can see the Navbar there are some menus the first one is the GitHub logo then a search bar and after that pull requests and after that Issues and just next to the issue that is codespaces. That's what we are focusing on in this blog. So let's click on that and what's in it.
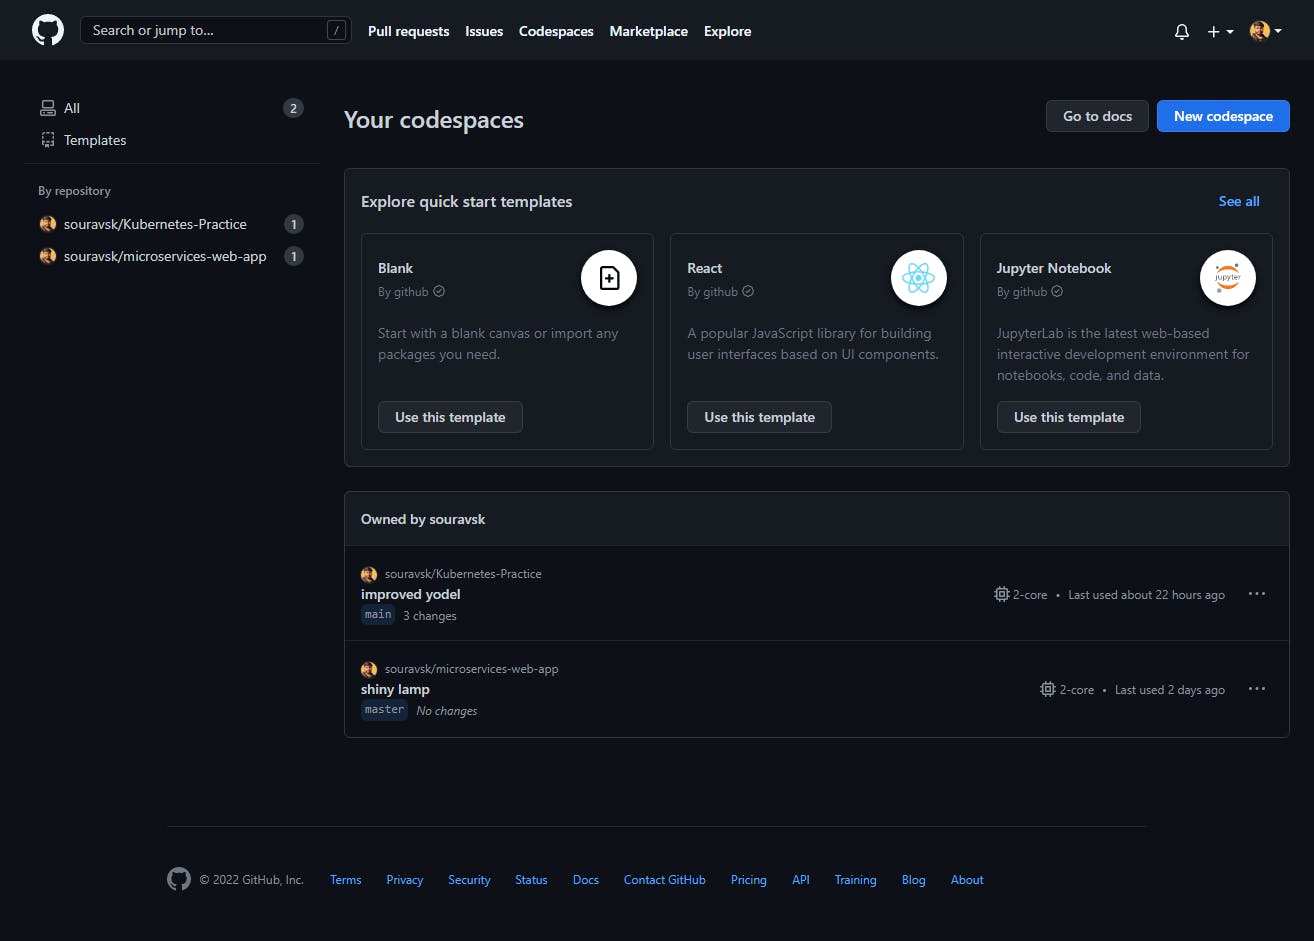
As you can see I have created two codespaces for my 2 repositories.
So I'm not doing to explain all the features that GitHub Codespaces provide otherwise it will be a long page and our main focus is to use minikube.
Step 2:- Start a Codespace
You can create and use a codespace for any repository you can clone. You can also use a template to create codespaces that are not initially associated with a repository.
Create a Codespace For any Repository
Create a codespace by going to the Repository Directly
Step:- A
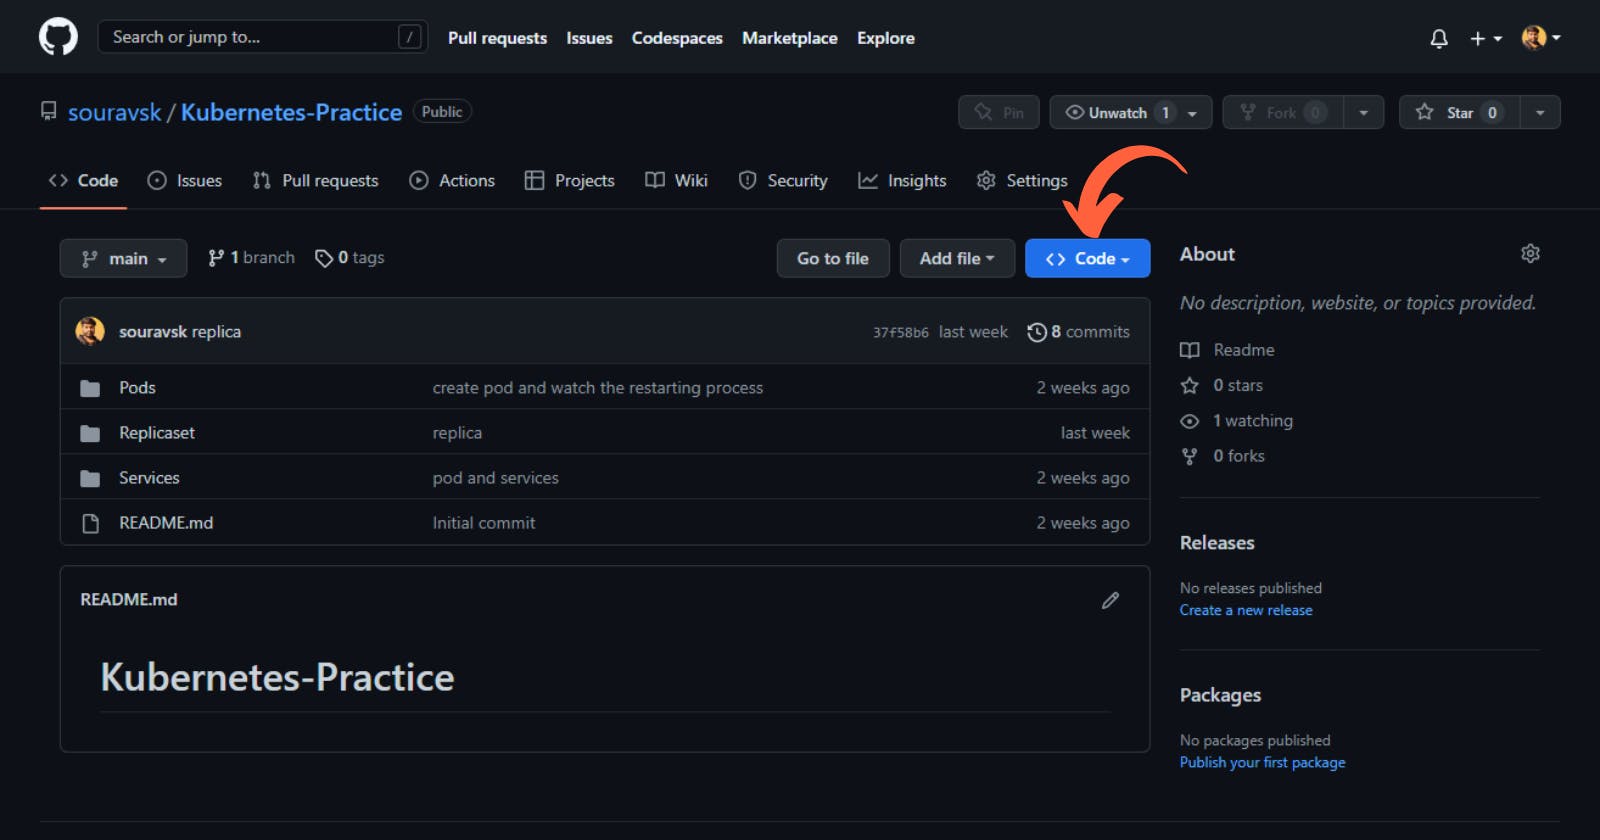
Open Your Repository for which you want to create the codespace for it. For me, it's this one.
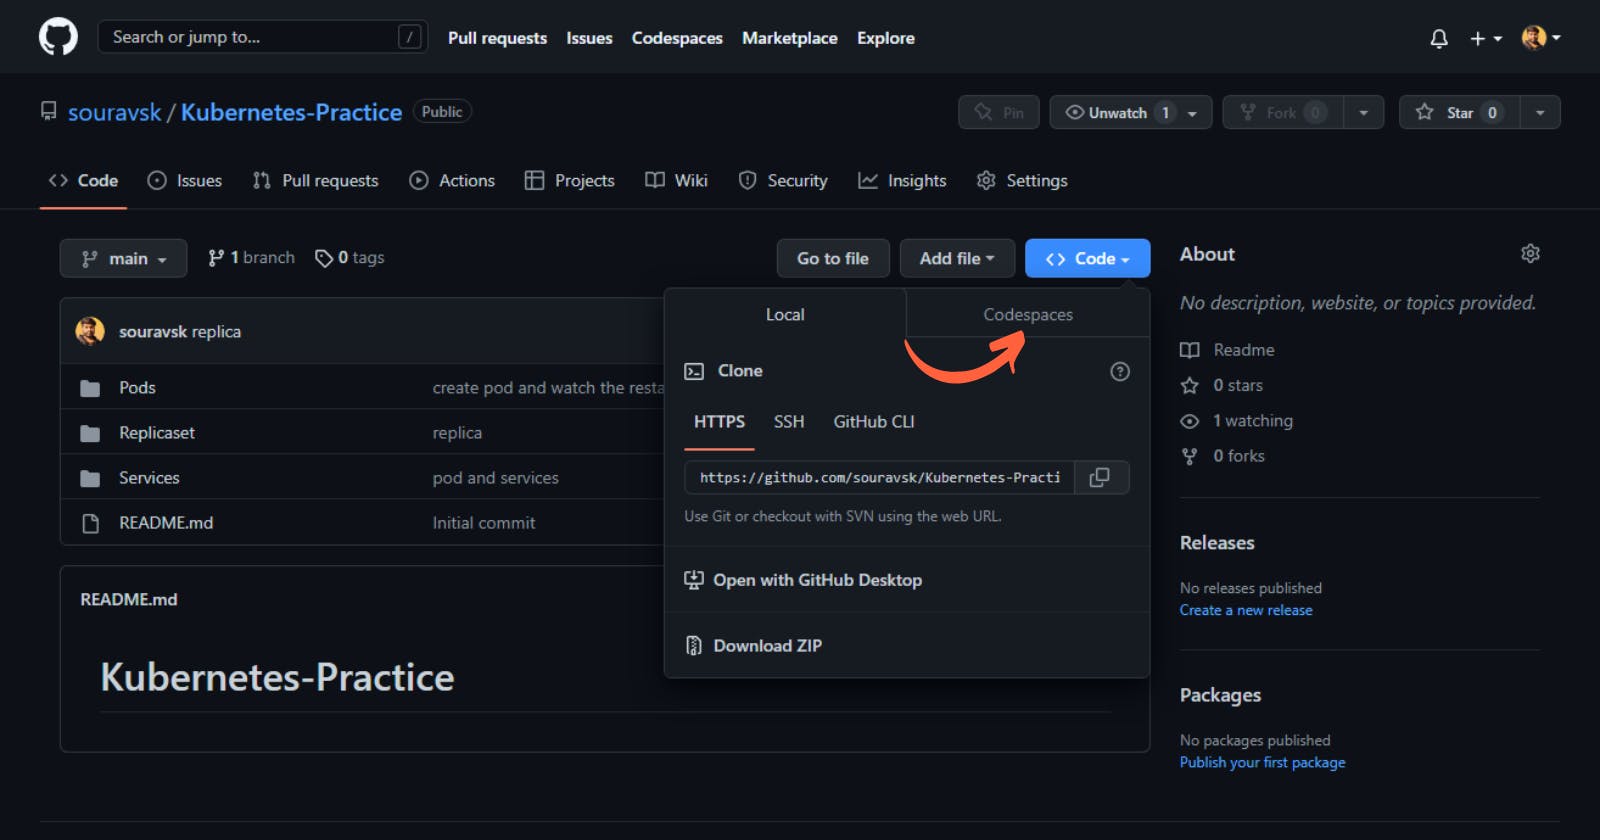
Click On the Code button
Step:- B
Click On the Codespaces Button
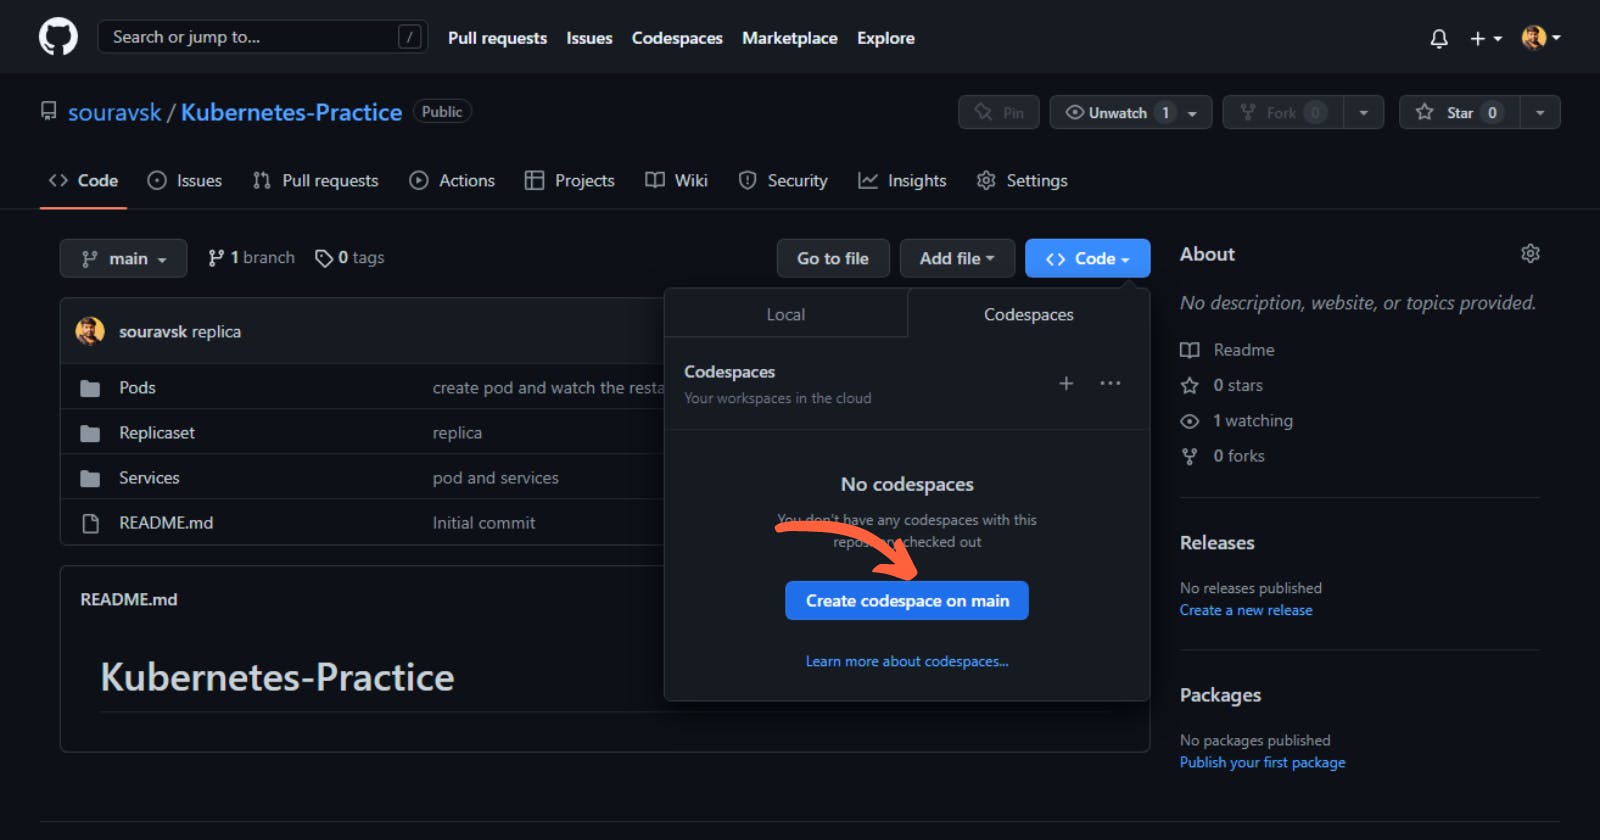
Step:- C
Click On the Create Codespace on main (Main is my branch name. It will show you the branch name that you have selected. If you want to create a codespace for a different branch then change the branch first then start the codespaces)
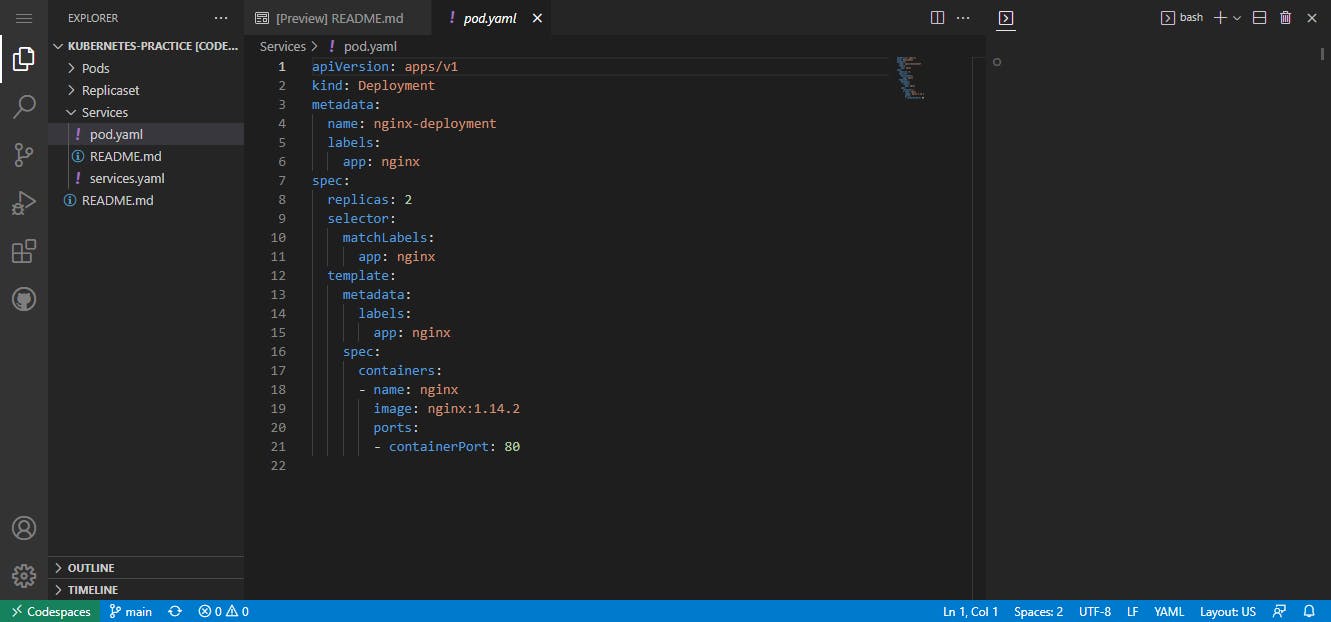
WOW!! It's our vs code. Now you can work on your project without thinking about anything on any machine and without worrying about the system.
This is one way of creating a codespace but there is another way also let's just take a quick look at it.
Create a codespace by going to the Codespace Page
Step:- A
Go to the Codespace by clicking on the codespace menu that is on the Navbar as we have seen earlier In Step 1
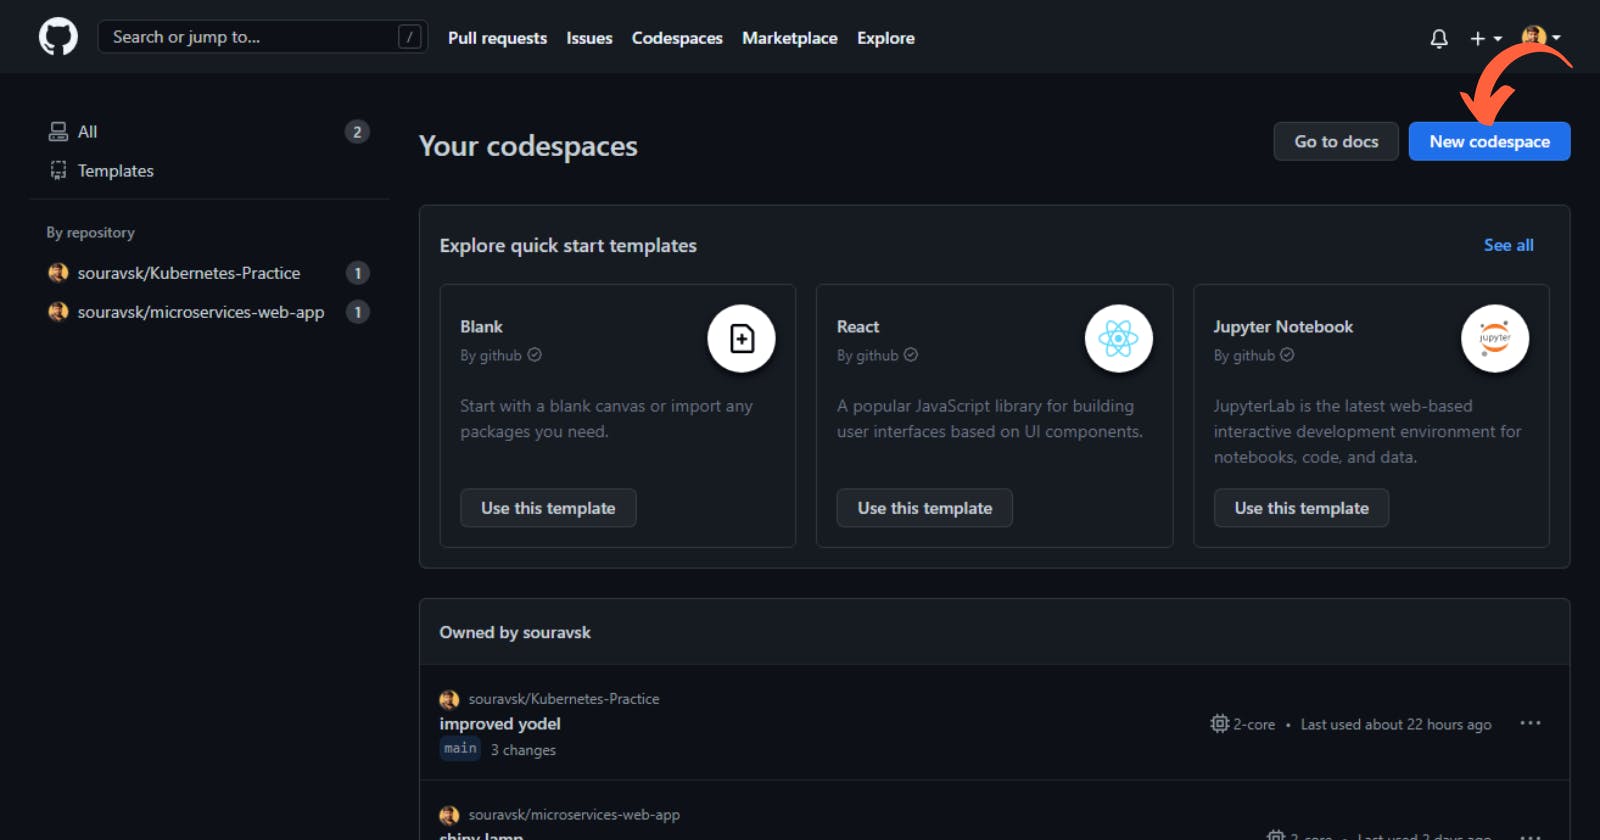
Step:- B
Click on the New Codespace
Step:- C
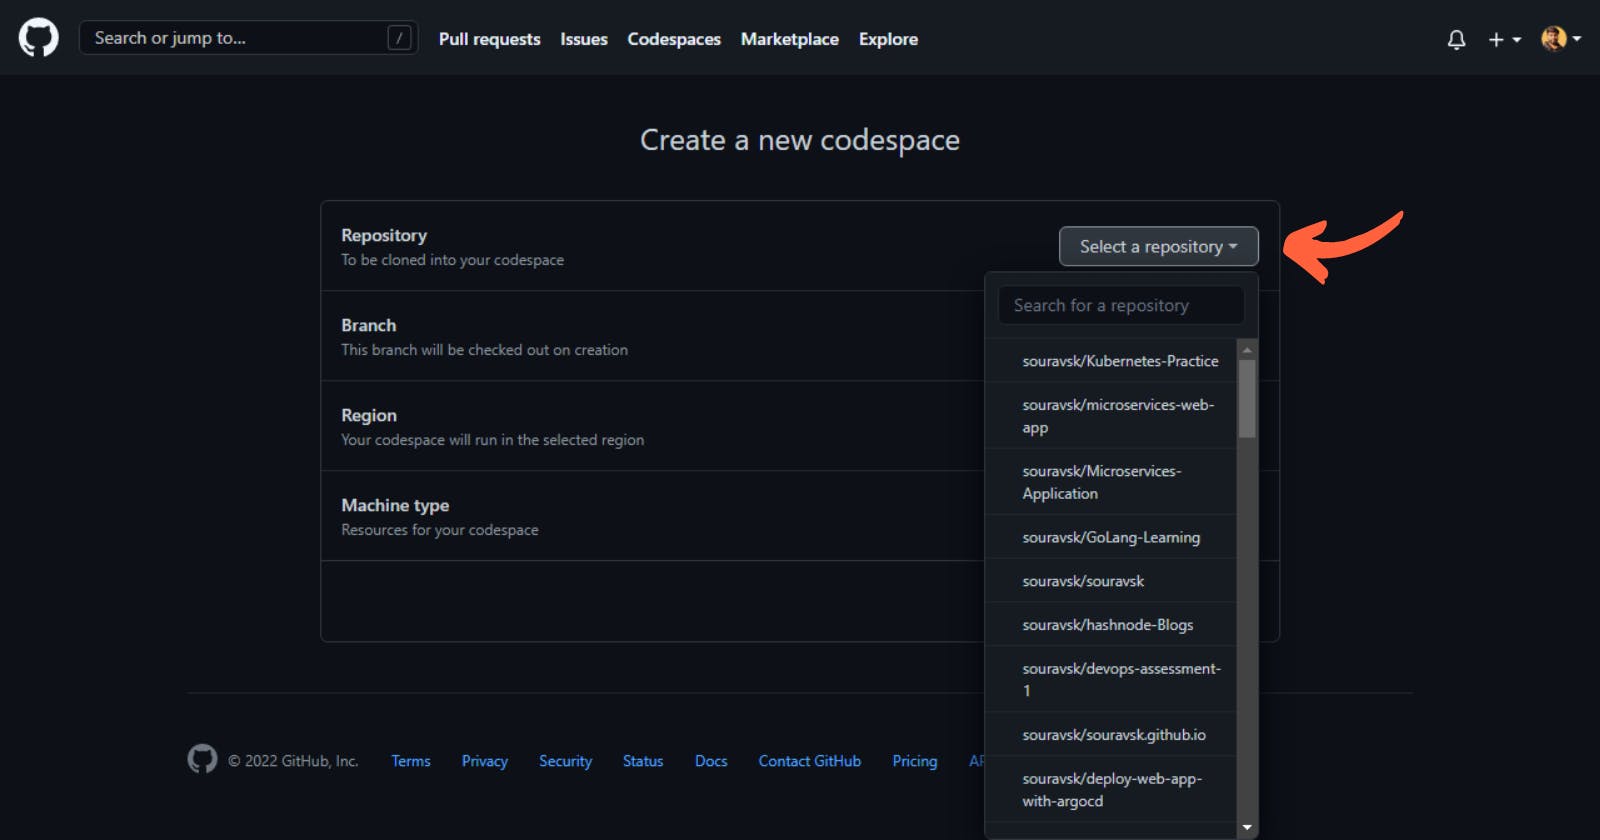
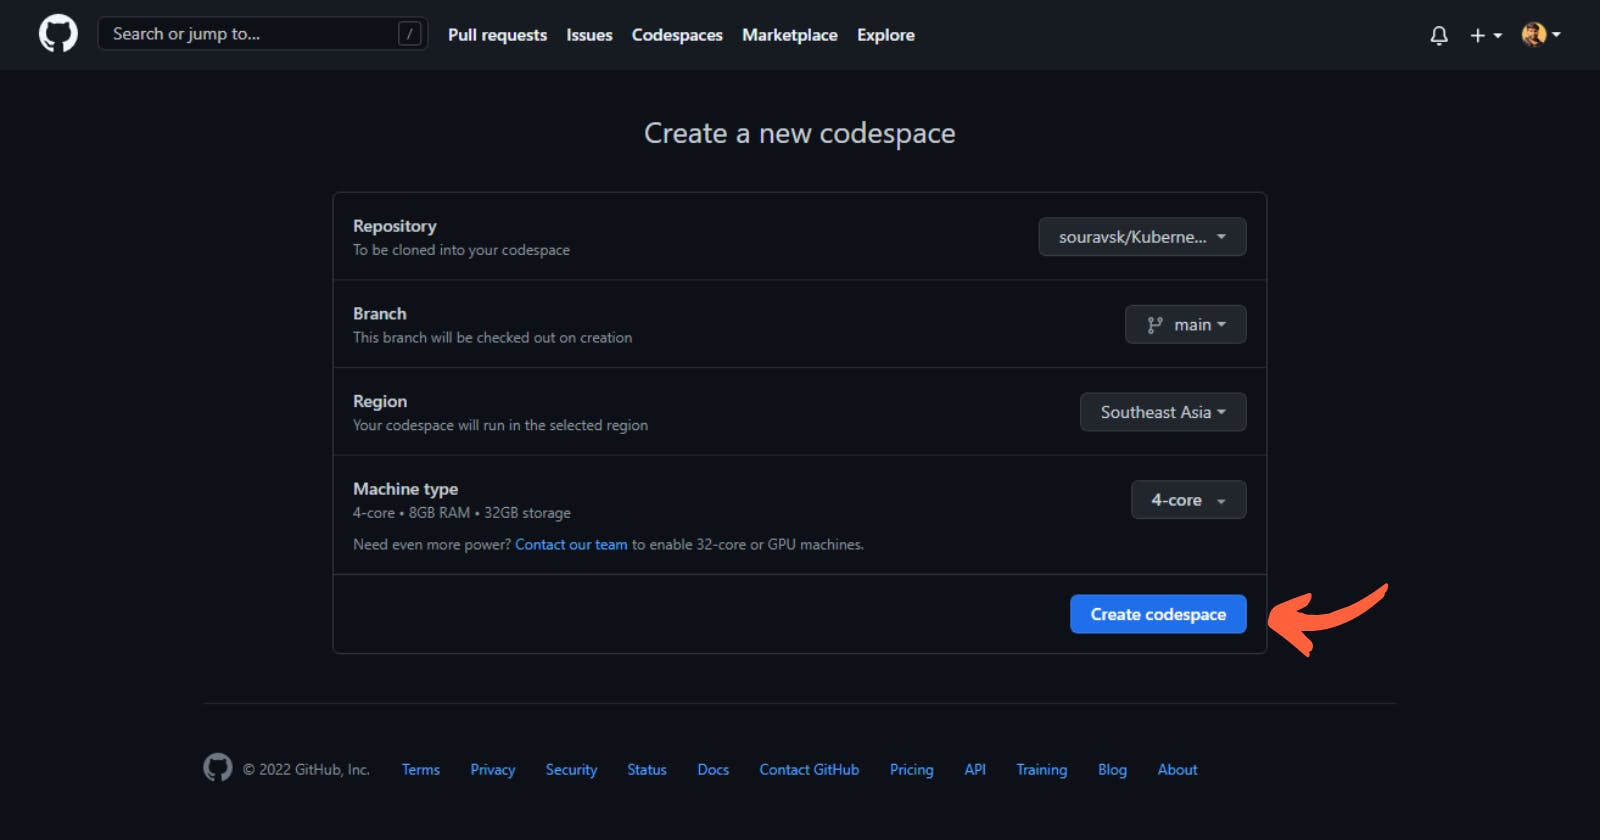
Now You can see the option that is available to create a new codespace.
Repository:- In this section, you will select the repository for which you want to create the codespaces for it. (You have to have a repository created already because it won't let you create any new repository here)
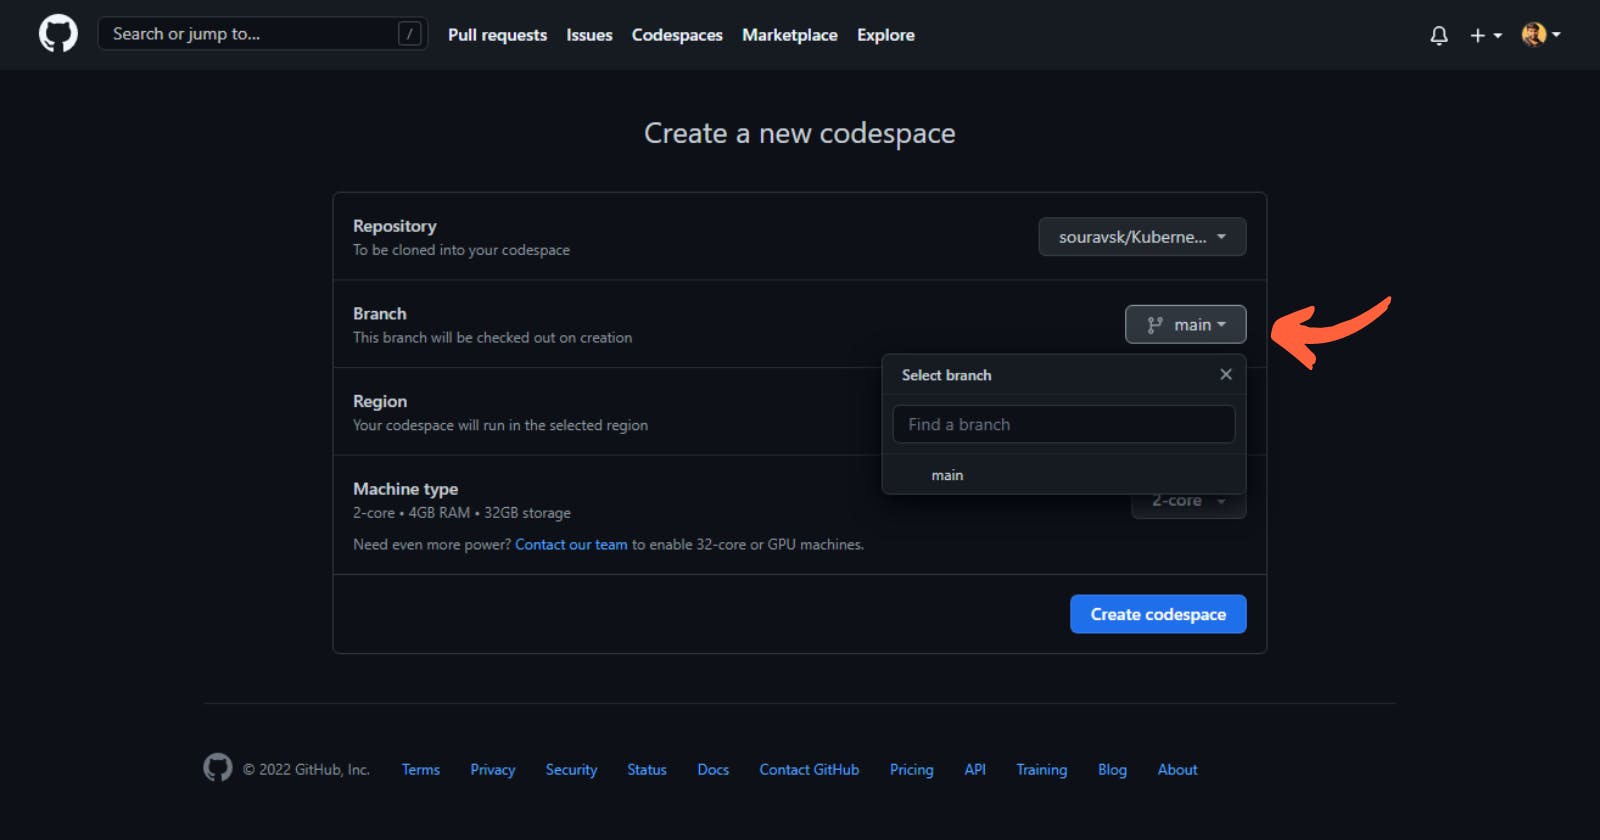
Brach:- In the section, you will select the branch for that repository. In my case, this repository only has one branch.
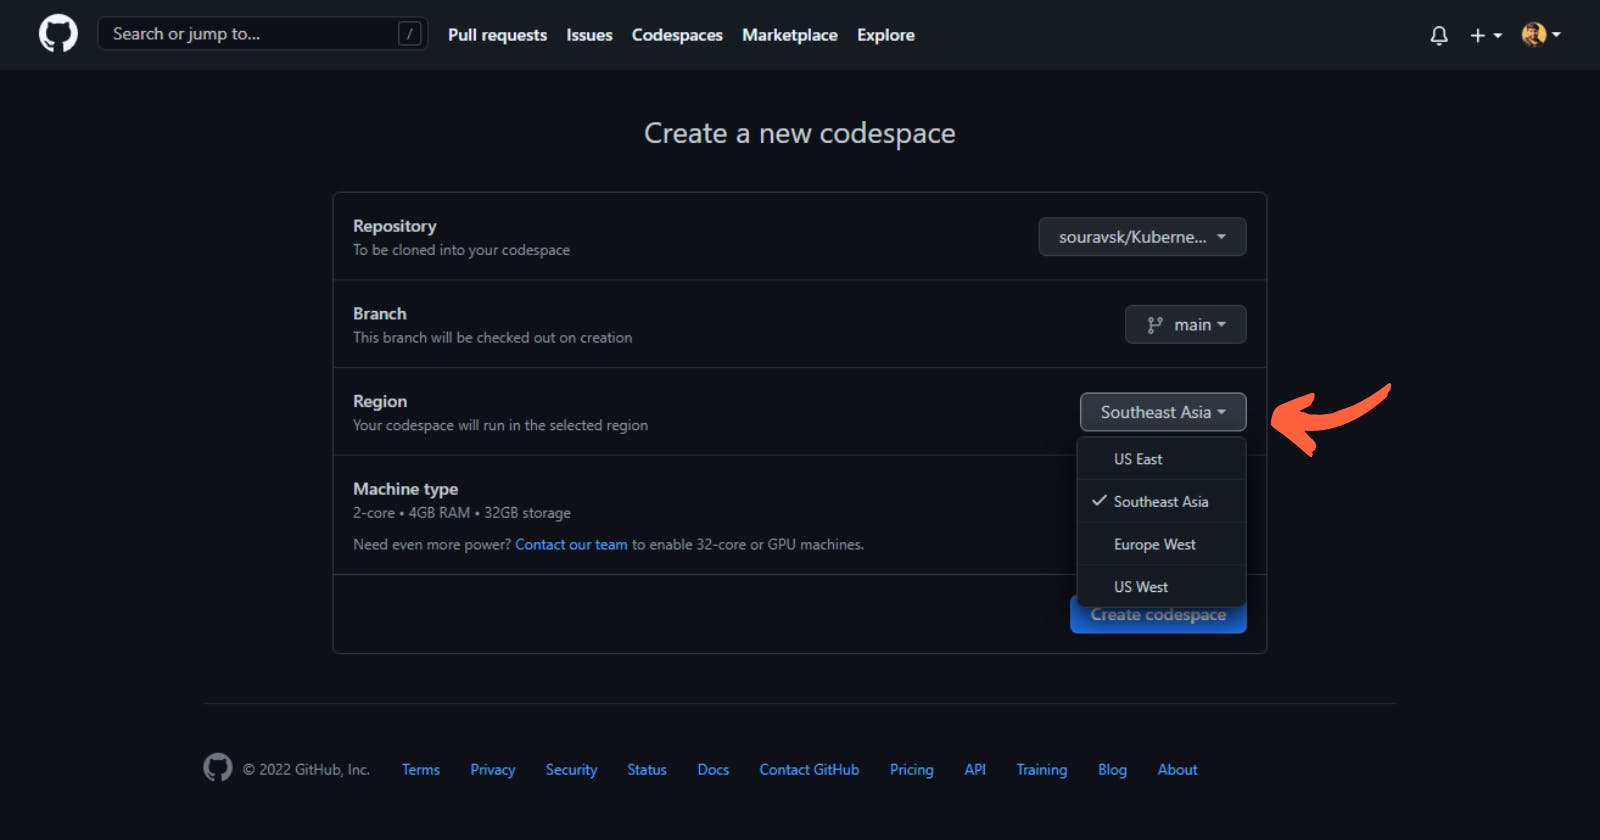
Region:- In this section, you will select the closest region available. I'm From India so I selected Southeast Asia. You can select your closest region.
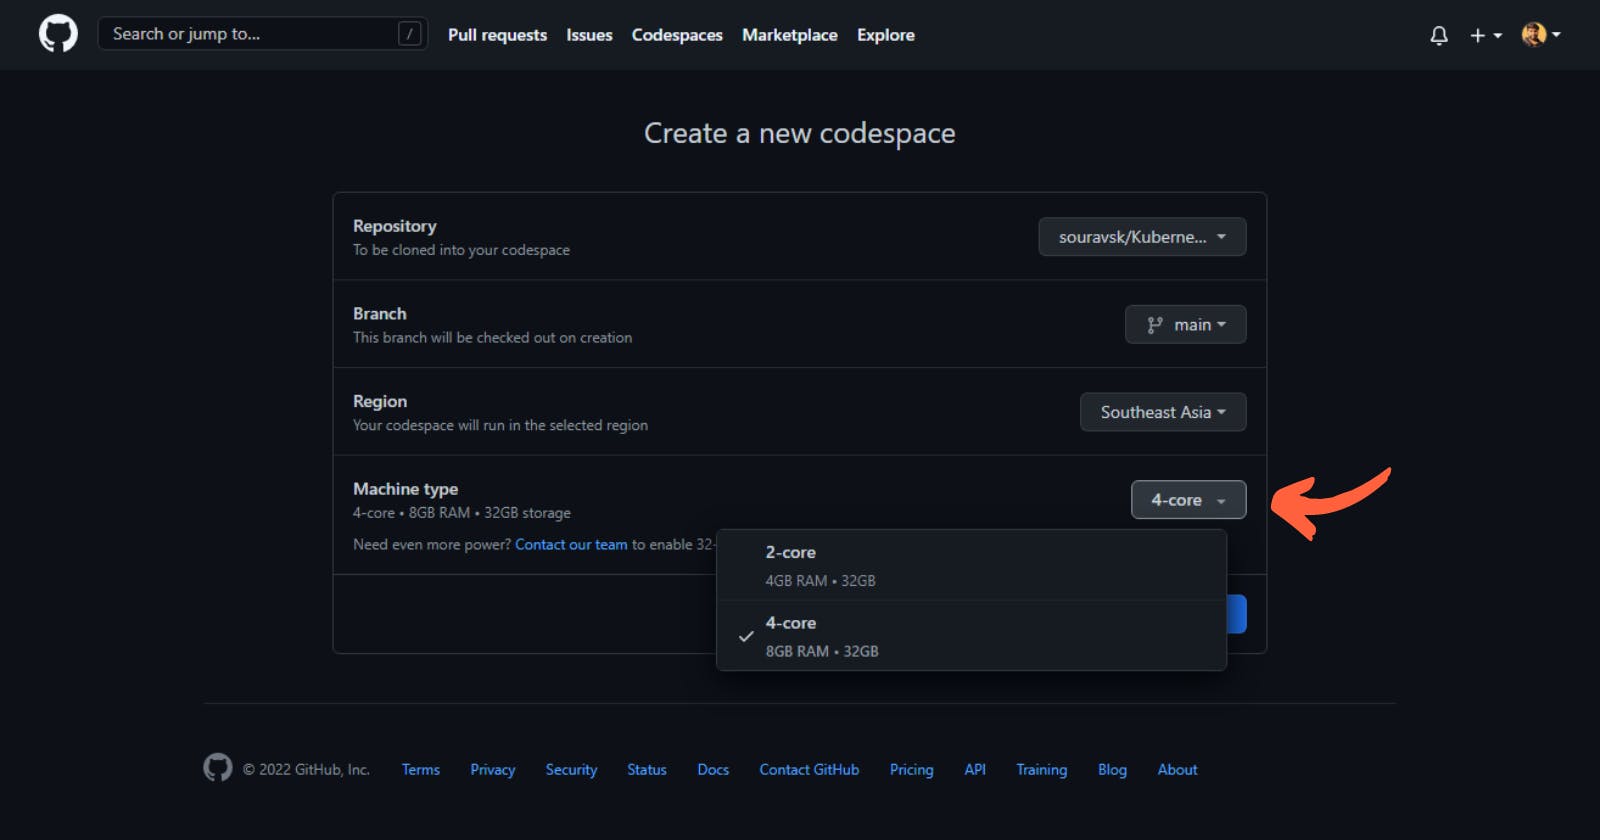
Machine Type:- In this section, you will select the machine which is will be enough for your project. We going to use minikube so we will select the 4-core, 8GB RAM and 32GB Storage.
Step:- C
Click on the Create Codespace
Now your Codespace is created

Use a Template To Create Codespaces
If you're starting a new project, you can get started with development work quickly by creating a codespace from a template. You'll be able to work on your project in a cloud-based development environment, save your files in the cloud, and publish your work to a new remote repository that you can share with others or clone to your local machine.
You can start from a blank template, choose from templates maintained by GitHub for popular technologies such as React or Jupyter Notebook, or launch a codespace from any template repository on GitHub. With a blank template, you'll start with an empty directory, with access to cloud-based compute resources and the tools, languages, and runtime environments that come preinstalled with the default codespace image. With other templates, you'll get starter files for the technology you're working with, plus typically some extra files such as a README file, a .gitignore file, and dev container configuration files containing some custom environment configuration.
Let's Create a Black template
Click On use this template from the Black Card
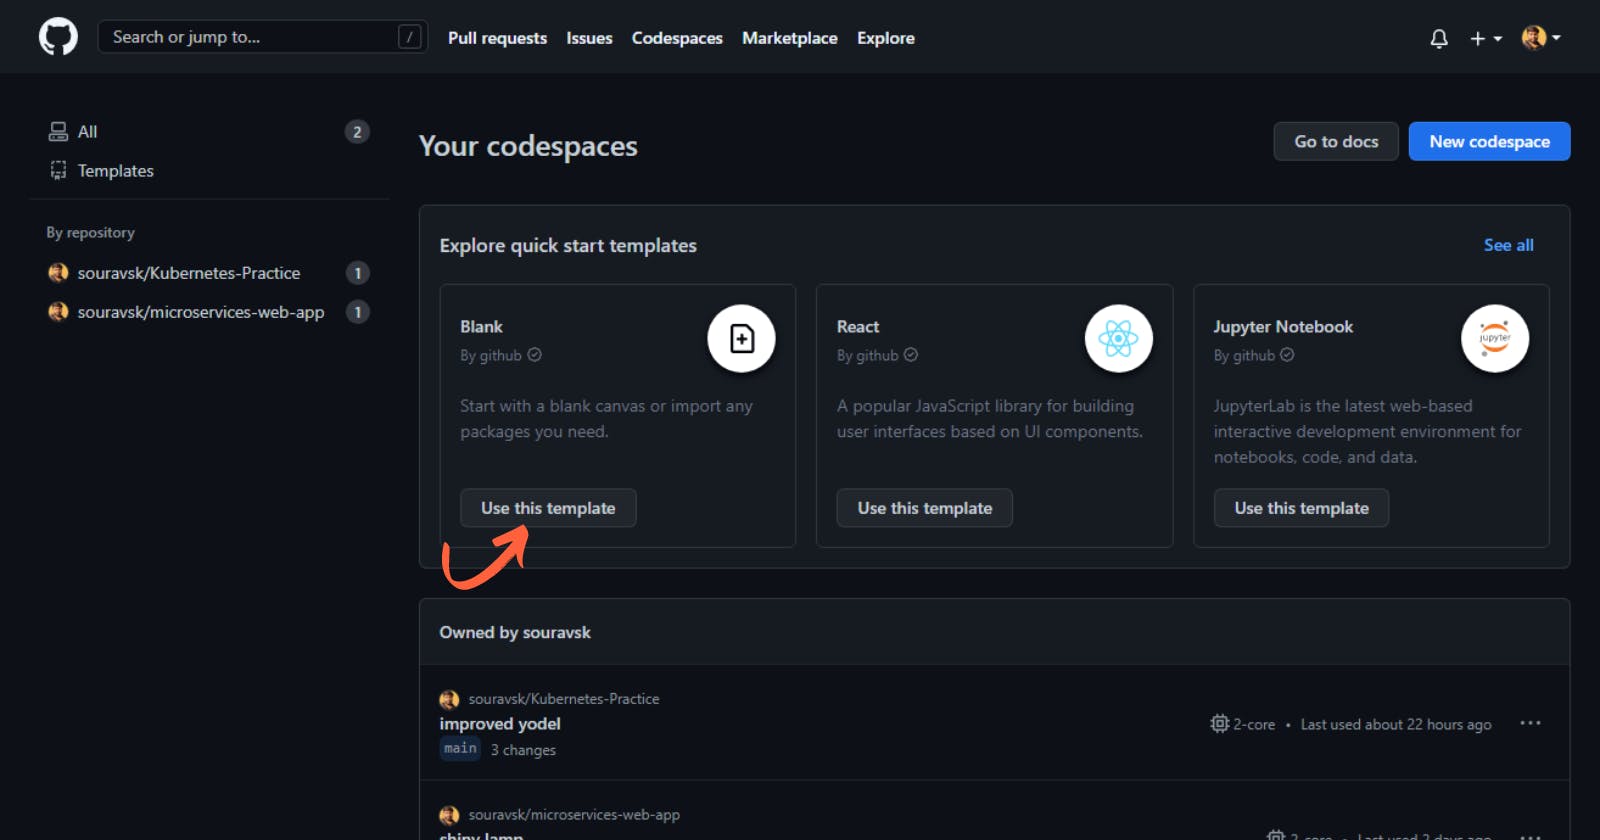
Just that it will create a codespace
Step 3:- Start the Minikuber
Now we will start the minikube I'm going to use the codespace that we have created in Step 2
Step:- A
Open the Terminal by Right Clicking on the Explorer and then clicking on Open in Integrated Terminal OR You can press Ctrl + ~ to Open The Terminal

Step:- B
Now type the command minikube start and press Enter
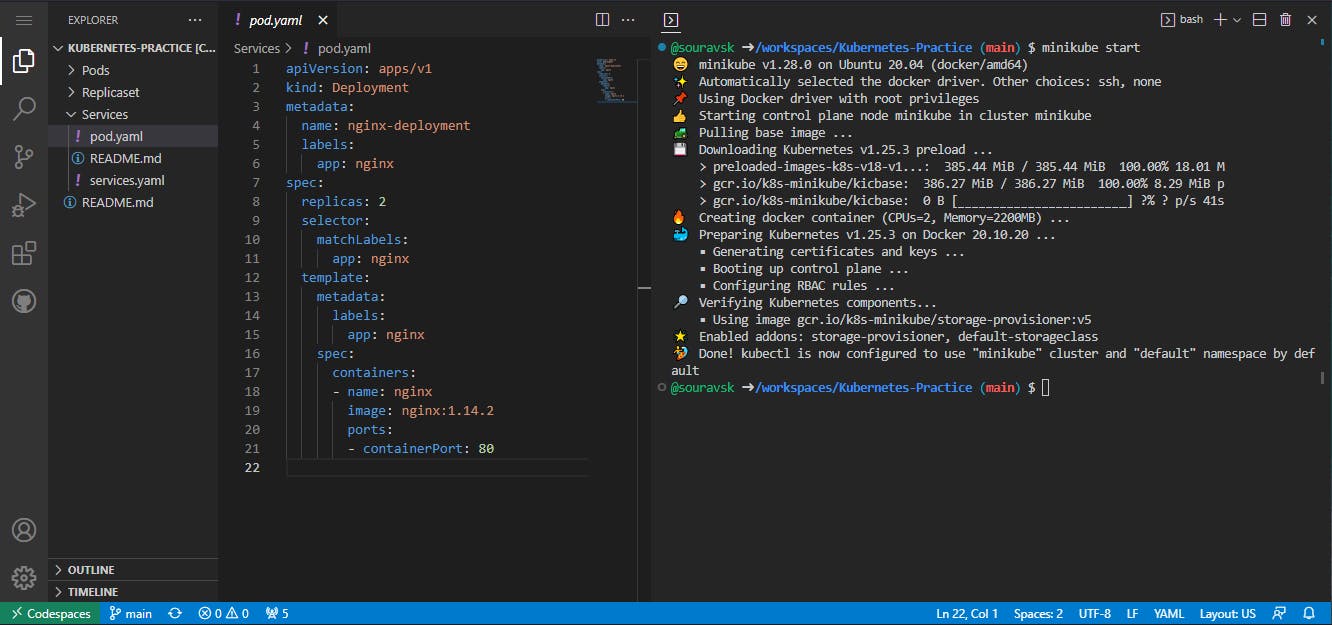
And that's it we have started the Minikube and see that kubectl is also configured with Minikube which means you can start using the right way.
THE END
That's all for today hope you learn something today please do share it with your friends so that they can also get to about the GitHub Codespace and use it as there need.